Step 1 — Turn on the feature in the app
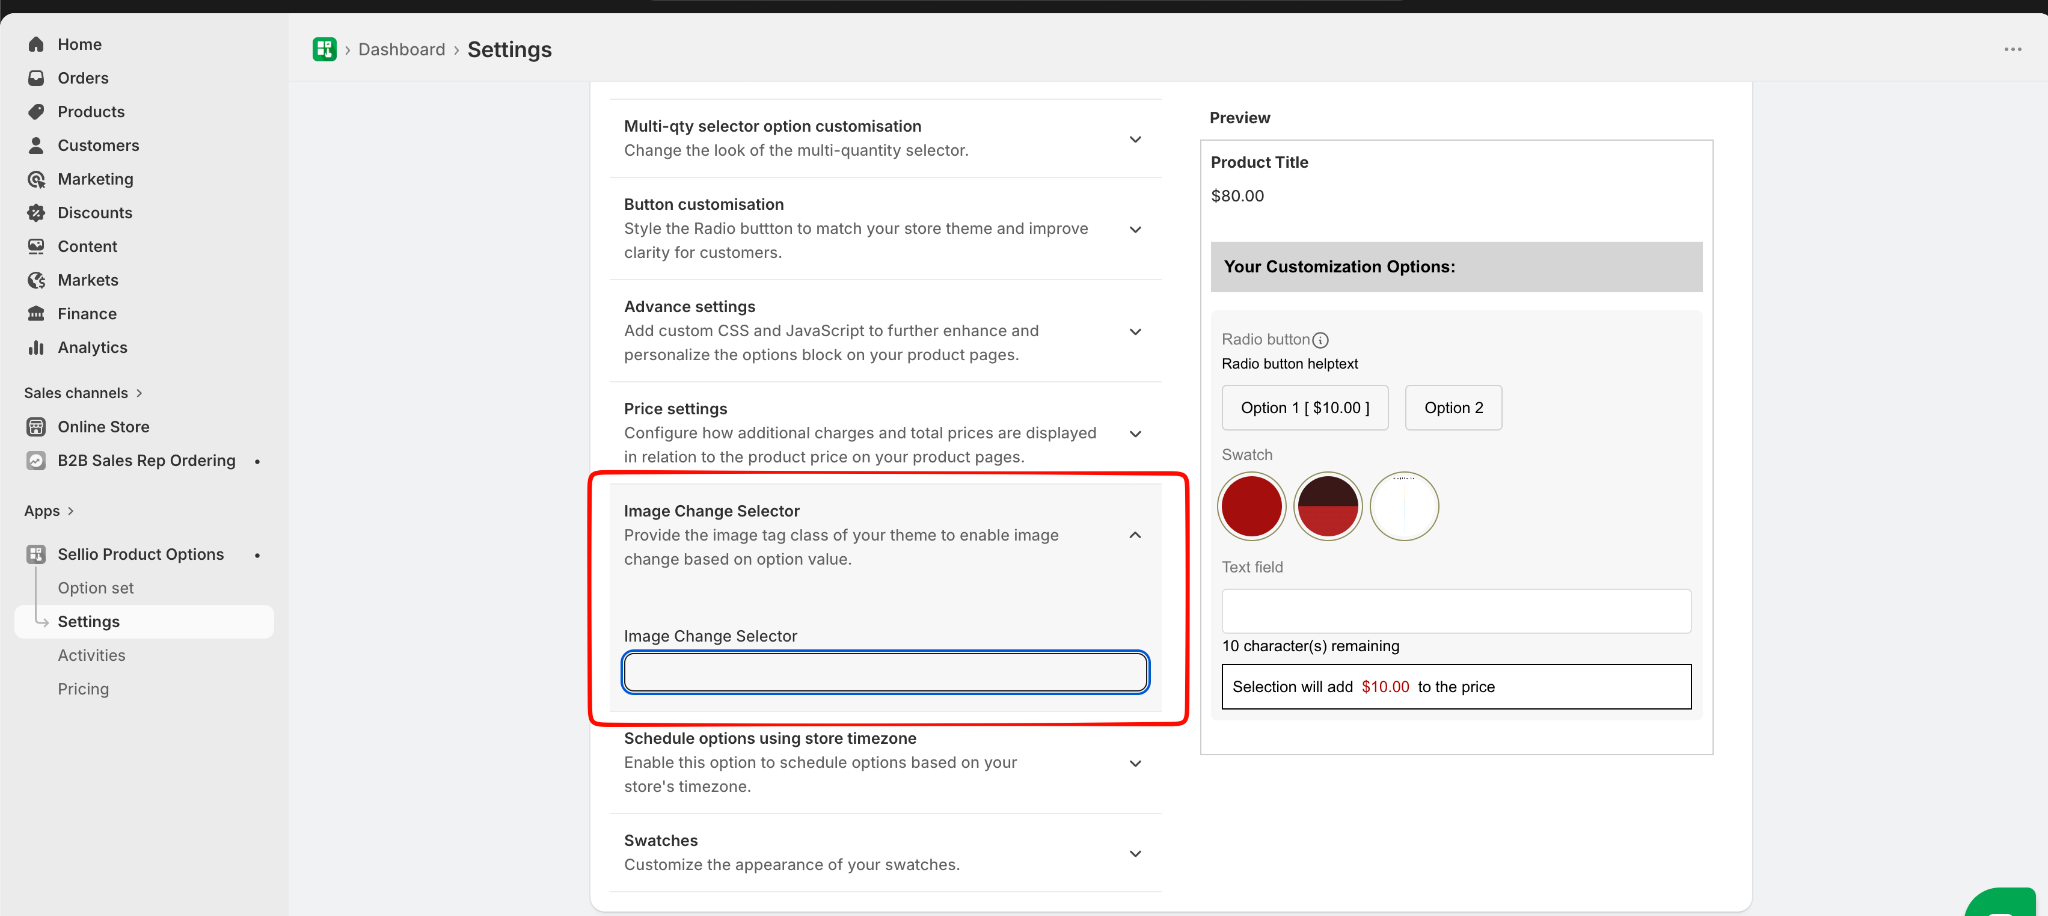
1. Open the app and go to **Settings**.
2. Find the **Image Change** section.
3. In the **Image Thumbnail Parents** field, enter the selector class for your theme's image area.
4. Click **Save**.
Step 2 — Mark which options should trigger an image change
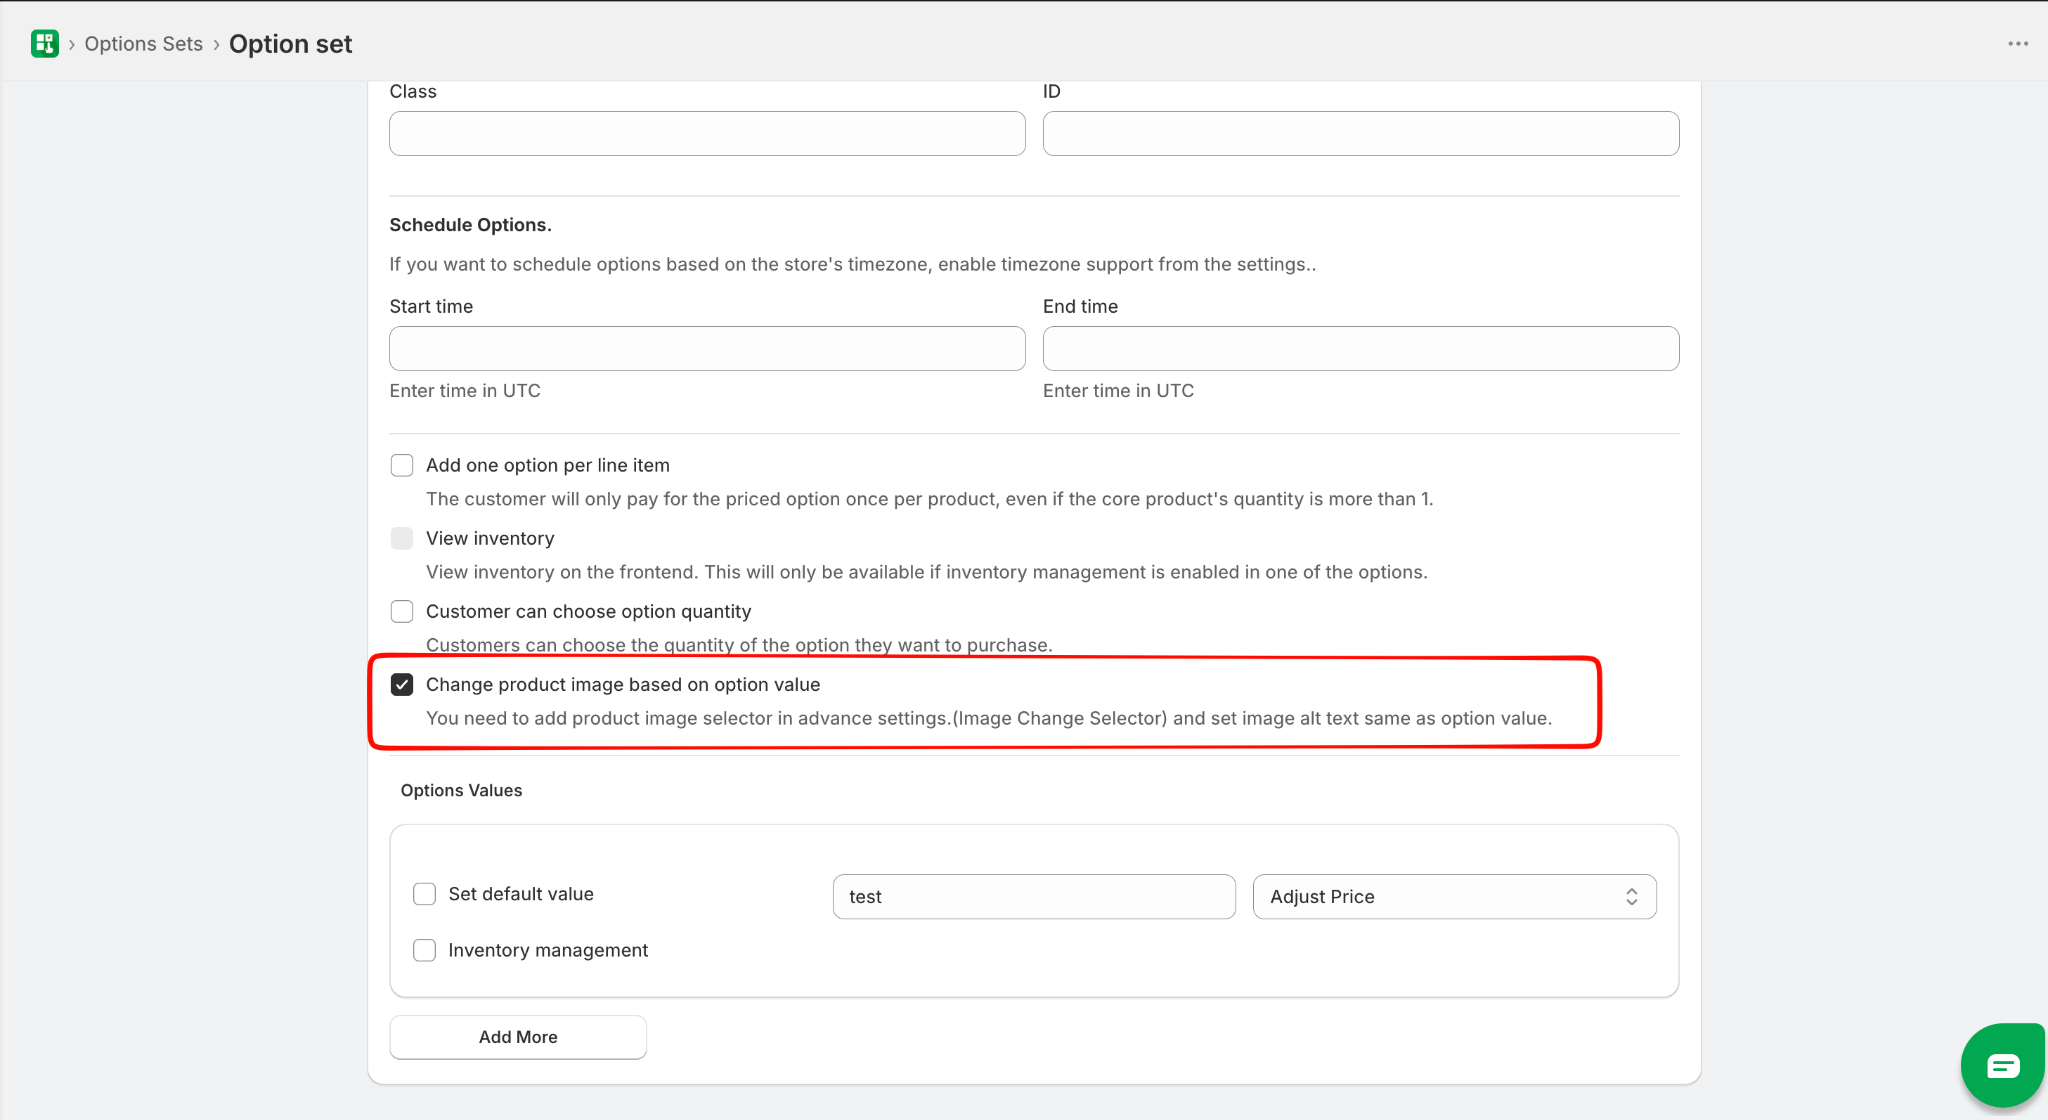
1. Open your **Option Set** in the app.
2. Edit the option (e.g. Color) that should control the image.
3. Turn on the **"Change Image"** toggle for that option.
4. If using the combination mode, do the same for every option involved (e.g. both Color and Size).
5. Save the Option Set.
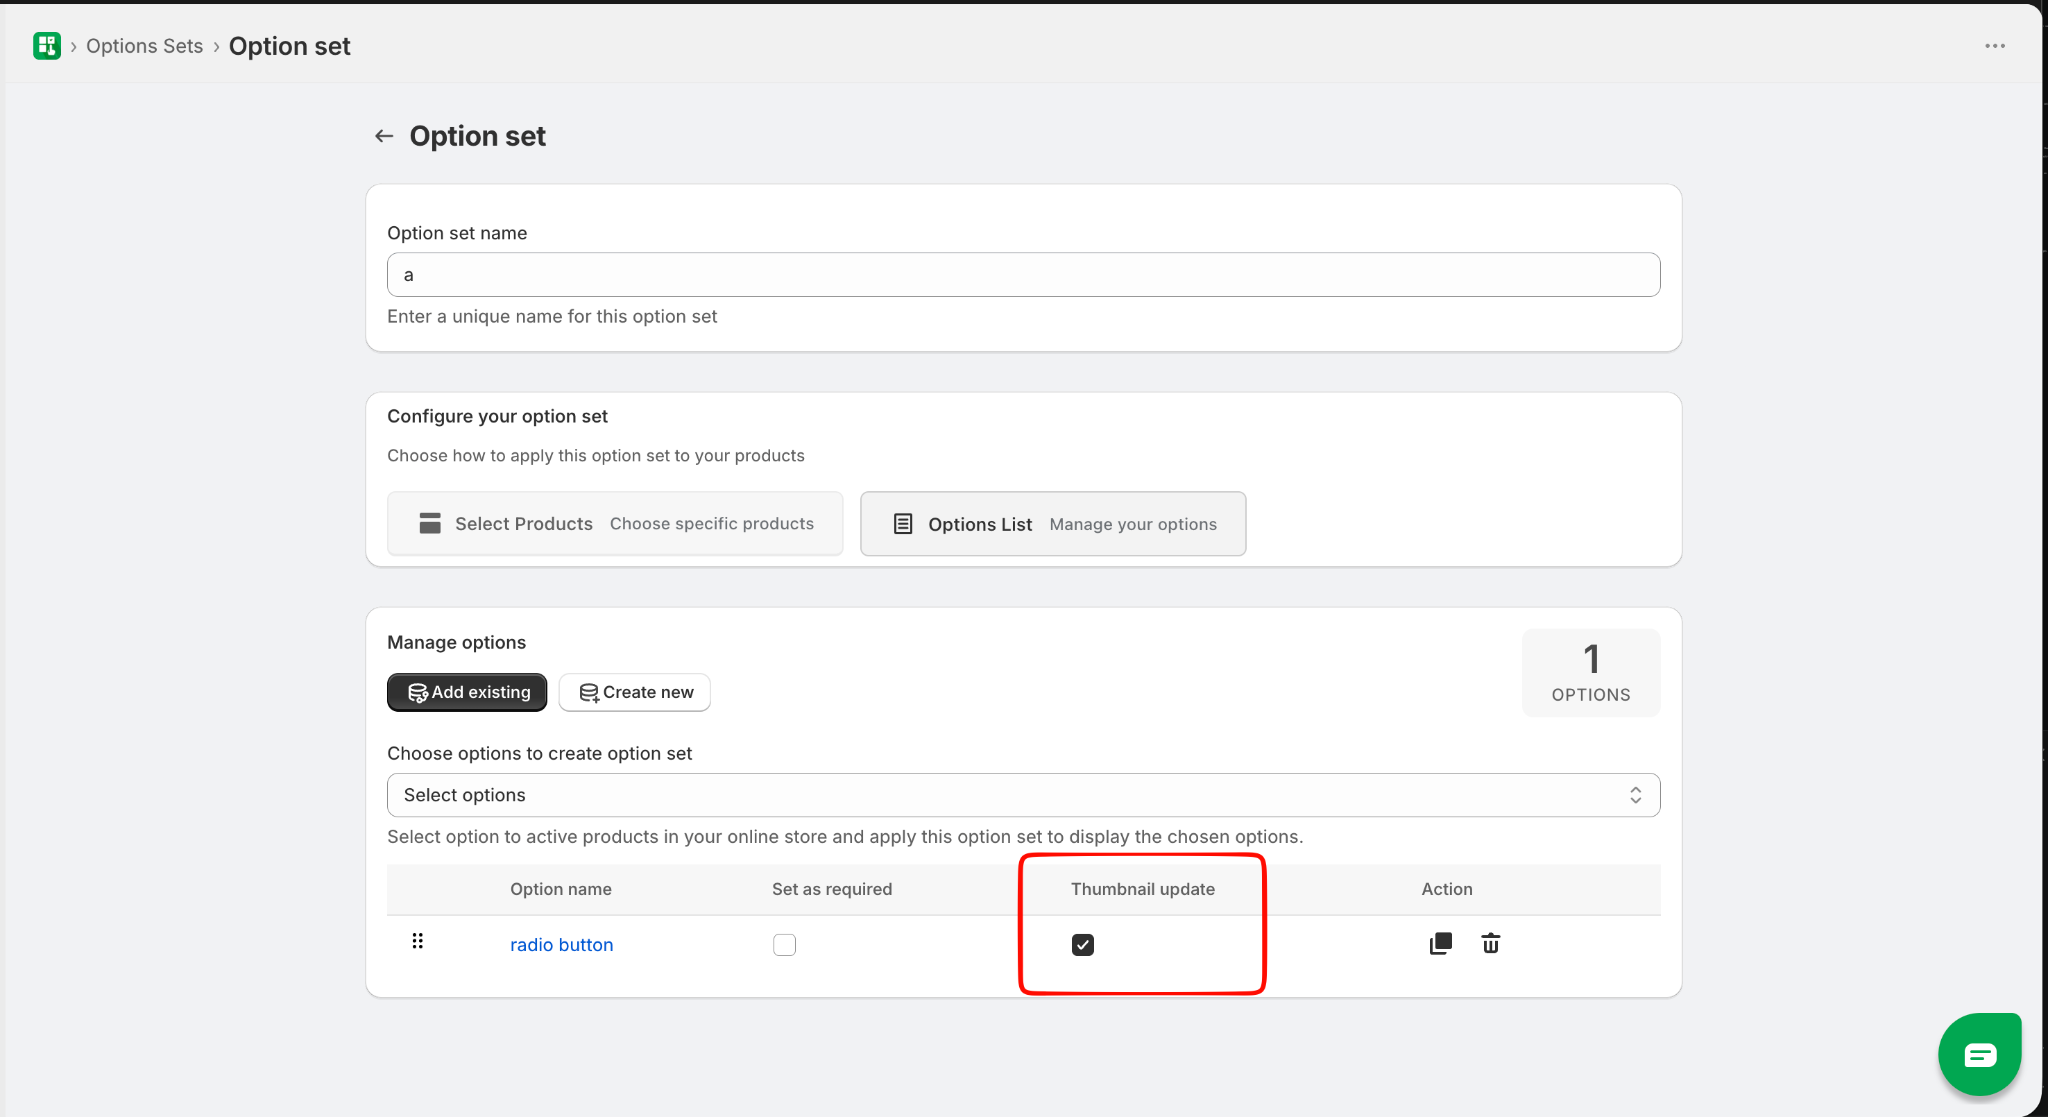
Make sure “Thumbnail update” is enabled for those options in the Options List of Option Set.
---
## Step 3 — Label your product images in Shopify
This is the most important step.
Go to your product in Shopify and add a label (alt text) to each image so the app knows which option value that image belongs to.
### How to add a label to an image
1. Go to **Shopify Admin → Products** and open your product.
2. Click on a product image.
3. Find the **"Alt text"** field (it's a small text box that appears when you click the image).
4. Type the label for that image (see the rules below).
5. Click **Save alt text**, then save the product.
Repeat this for every image that should appear when a certain option is selected.
---
## What label should I type?
### If one option controls the image
Type the option value exactly as it appears in your option set.
| Option selected by customer | Label to put on the image |
|---|---|
| Red | `Red` |
| Blue | `Blue` |
| Large | `Large` |
### If a combination of options controls the image
Type all the values together, separated by a single space, in the same order the options appear in your option set.
**Example:** If your option set has Color first, then Size:
| Customer selects | Label to put on the image |
|---|---|
| Red + Small | `Red Small` |
| Red + Large | `Red Large` |
| Blue + Small | `Blue Small` |
| Blue + Large | `Blue Large` |
---
## Good to know
- **Capitalisation doesn't matter** — `Red`, `red`, and `RED` all work the same way.
- **The order of values matters for combinations** — always follow the order of your options as they appear in the app. If Color is listed before Size, write `Red Large`, not `Large Red`.
- **One space between values** — don't add extra spaces.
- **Keep labels clean** — the label should only contain the option value(s), nothing else like punctuation or extra words.
---
## Full example
You sell a t-shirt in two colours (Red, Blue) and two sizes (Small, Large). You want the image to change based on both colour and size.
You would upload 4 images and label them like this:
| Image | Label (alt text) |
|---|---|
| Red shirt, size Small | `Red Small` |
| Red shirt, size Large | `Red Large` |
| Blue shirt, size Small | `Blue Small` |
| Blue shirt, size Large | `Blue Large` |
When a customer picks **Red** and **Large**, the app will automatically show the "Red Large" image.
---
## Something not working?
**Images aren't switching at all**
- Make sure the feature is turned on in Settings.
- Check that the options in your Option Set have the "Change Image" toggle enabled.
**The wrong image is showing**
- Double-check the order of the values in your label — it must match the order of options in the app.
- Make sure there are no extra spaces or typos in the label.
**Only some images are switching**
- Every image needs a label. If an image has no alt text, the app will skip it.
If you're still stuck, reach out to our support team with a screenshot of your option set and your product images — we're happy to help.
Was this article helpful?
That’s Great!
Thank you for your feedback
Sorry! We couldn't be helpful
Thank you for your feedback
Feedback sent
We appreciate your effort and will try to fix the article